
Contents
With multi-tier IaaS solutions, such as SharePoint on Azure, it is important that the Virtual Machines are started and stopped in the correct order to ensure that they operate correctly.
Particularly in DevOps Scenarios where you have multiple development Environments (1 per developer) costs can be reduced by starting the environment as the developer starts working and stopping it when he leaves for the day, weekend or holidays.
In this article I will explain how Azure Automation together with Azure Resource Manager Tags and PowerShell can be used to execute these steps for you in a generic manner at the click of a button.
Example Scenario
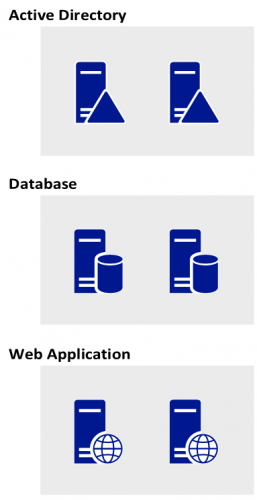
With a Dynamics CRM environment you usually have 3 tiers:
- Active Directory
- Database (SQL Server)
- Web Application (Microsoft Dynamics 365)
These tiers have to be started in the order 1-3 while waiting an appropriate amount of time between each step to allow the services to start.
Conversely, when shutting down the environment, the order is 3-1 and we have to wait the appropriate time for the services to stop gracefully, though this is usually faster than waiting for them to start.
If there are multiple machines within a tier, for example in a QA environment, then these should ideally be booted or shut down at the same time.
I will explain how to accomplish this utilizing Azure Automation and PowerShell
Setting up ARM Tags
In order for the script to be flexible and reusable for several types of environments we will use Azure Resource Manager tags.
The first tag will tell the PowerShell Script which tier the VM belongs to. I am going to use the tag name "tier" and assign two digit numbers starting with 1 ie. { "tier" : "01" }, { "tier" : "02" }.
In addition I add tags for the start and stop timeout for each tier. This way we can ensure that the script pauses execution while it waits for the virtual machines to start or shutdown in an orderly fashion. I am going to name them "tierStartupTimeoutSeconds" and "tierShutdownTimeoutSeconds" ie. { "tierStartupTimeoutSeconds" : "60" }, { "tierShutdownTimeoutSeconds" : "10" }.
For an Active Directory Domain Controller tier I would use :
{
    { "tier" : "01" },
    { "tierStartupTimeoutSeconds" : "60"  },
    { "tierShutdownTimeoutSeconds" : "10"  }
}
Instructions on adding tags from ARM templates, PowerShell or the Portal are here.
Azure Automation
You will need to setup an Azure Automation account with a Run As Account so that the script can be executed. Please be aware that the run as account you create is scoped to the subscription the automation account was created in.
You can then create a new PowerShell runbook.
PowerShell Runbook
We will now look at the script which uses the AzureRM PowerShell module.
For this Script we will accept an input parameter called $ResourceGroup, which will determine which Virtual Machines are processed, those inside the ResourceGroup or all within the current subscription.
param (
    [String] $ResourceGroupName = ''
)
The first step is to authenticate using the Azure Run as Account. If you are not yet familiar with the use of backticks (`) in PowerShell; they are used to split long commands into multiple lines for legibility.
$servicePrincipalConnection = Get-AutomationConnection -Name AzureRunAsConnection

Add-AzureRmAccount `
    -ServicePrincipal `
    -TenantId $servicePrincipalConnection.TenantId `
    -ApplicationId $servicePrincipalConnection.ApplicationId `
    -CertificateThumbprint $servicePrincipalConnection.CertificateThumbprint | Out-Null
Next we will get all the VMs for the current Scope, which is an array of VirtualMachine,
$vms = Get-AzureRmVM -ResourceGroupName $ResourceGroupName
We will now Group the VMs based on the "tier" tag and sort them based on this. Notice that for stopping the VMs we would need the opposite order so we would only have to add the -Descending flag to the Sort-Object function.
$groupedVMs = $vms | `
    Group-Object -Property { $_.Tags.tier } | `
    Sort-Object -Property Name
Now we will iterate over the grouped VMs, every $vmGroup now represents a GroupInfo object which has a Group property that contains an array of VMs for each tier. We also initialize/set the variable $anyStarted to $false which will be explained later.
for($tier = 0; $tier -lt $groupedVMs.Length; $tier++)
{
    $vmGroup = $groupedVMs[$tier]
    $anyStarted = $false
    foreach($vmInfo in $vmGroup.Group)
    {
We will now retrieve the current status of the VM to see whether it needs to be started,
        $vm = Get-AzureRmVM `
                -Status `
                -ResourceGroupName $vmInfo.ResourceGroupName `
                -Name $vmInfo.Name
Reading the Status of the VM is a little tricky. The values within the string array $vm.Statuses are formatted as {StatusType}/{Status} so for example ProvisioningState/succeeded or PowerState/deallocated. We therefore need to search for the status that starts with "PowerState" and then analyse the part that comes after the slash. The length of PowerState/ is 11 and we check whether the remainder is equal to running. For stopping the machines we would use deallocated. If the machine is not running we will output a message that we are starting it, start it and then set the variable $anyStarted to $true.
        if(($vm.Statuses | `
                Select-Object -ExpandProperty Code | `
                ? { $_.StartsWith("PowerState") }).Substring(11) -ne 'running')
        {
            Write-Output "Starting $($vm.Name)"
            Start-AzureRmVM -ResourceGroupName $vmInfo.ResourceGroupName -Name $vmInfo.Name
            $anyStarted = $true
        }
    }
After we have started all the VMs in the current tier that are not started we wait for them to boot. First we check whether we have to wait at all by looking at the $anyStarted variable, since waiting when the Virtual Machines were already running is superfluous. We also don’t have to wait if this is the last tier ($tier -gte $groupedVMs.Length). The reason I don’t want the Script to pause execution unnecessarily is that the Azure Automation Account charges you for Job Run Time even if the script is idle as when executing Start-Sleep. We then read the amount of time to pause execution for from the tierStartupTimeoutSeconds tag of the first VM found in the tier and wait for that amount of time.
    if($anyStarted -and ($tier -lt $groupedVMs.Length))
    {
        $secondsToWait = [int]::Parse($vmGroup.Group[0].Tags.tierStartupTimeoutSeconds)
        Write-Output 'Tier $tier started. Waiting $secondsToWait seconds.'
        Start-Sleep -Seconds $secondsToWait
    }
}
Conclusion
I hope that you have learned something about Azure ARM Tags and PowerShell scripting, specifically in the context of Azure Automation and the Azure Resource Manager PowerShell Module.
I have another post explaining how this Azure Automation PowerShell Runbook can be triggered from any device using Azure Functions.
You can find the full start and stop scripts here:
You must log in to post a comment.